
How To Clean Vinyl Records By Hand
You put your vinyl down on the turntable, the needle drops and as the music creeps into existence you notice more crackling and surface noise than usual. You’re wondering “Does my stylus need to be replaced? Why does it sound like there’s dust-caked onto the grooves of my record?”.
Chances are, your vinyl is fine – it just needs to be cleaned. Before you jump to any conclusions and go by new parts for your turntable, try cleaning the grooves out and see if it doesn’t solve your problem.
As long as you haven’t been using your copy of Radiohead’s OK Computer as a coaster (or playing Ultimate at the park with it) a good cleaning job will make a night and day difference in sound quality.
Although there are vacuum record cleaning machines that cost more than $700 – there are much cheaper ways to preserve the quality of your vinyl. Now that that’s out of the way, let’s go over a few of the most effective ways on How To Clean Vinyl Records By Hand. By the end of this, you’ll be armed with some easy cost-effective, DIY methods for keeping your records in mint condition.
How To Clean Vinyl Records By Hand
A good rule of thumb for keeping your records in good condition is to minimize the amount of skin contact with your disc. Similar to avoiding contact with the shiny part when handling a CD, you want to do your best not to touch any part of the record that has grooves.
Your skin’s oils will wear the vinyl down over time – especially if you’re handling them incorrectly over and over again. It can take some getting used to at first when you’re jiggling the disc out of its protective sheet but after a few tries, you’ll get the hang of it.
Taking preventative measures like this might not seem like a big deal, but will go a long way towards preserving the lifespan and quality of your favorite records.
In order to perform a range of cleans (from basic to a deeper clean), these are the 3 main methods that work best.
We’ll go over each method in detail, then you can decide which one you like the best. There will always be an element of subjectivity when it comes down to which one you prefer and once you try them out, you can be the judge of that. Now that that’s out of the way, let’s take a closer look at each method.
Dry Methods For Cleaning
The dry methods are probably the easiest way to clean obvious debris from the surface of your vinyl. There are inexpensive speciality brushes that have anti-static properties and work best for a quick clean before each spin.
What You’ll Need:
- Anti-static brush (here’s one of the Best-Selling brushes on Amazon)
- Lint-free cloth (glasses lens cloth or microfiber cleaning cloth)

A Few Simple Steps:
As your record is spinning, take the brush and hold it lightly over the surface and let the brush do the work. After one or two full rotations flip it over and do the same for the other side.
Once you’ve done that – take the brush and angle it towards the edges of the record and slowly brush in that direction. To get the most out of this method, you should do it before and after each play. This is the baseline, absolute minimum step to take for keeping your vinyl in good condition.
When using a lint-free cloth like a glasses lens cleaning cloth or microfiber towel, perform the same steps we covered above, but with your cloth. It’s debatable whether or not a cloth cleans the surface as well but if you do nothing else – wipe it down with a cloth (microfiber/lint-free works best).
Pros:
- Works great for a quick clean
- Most cost-effective method
- The easiest way to preserve the quality of your vinyl
Cons:
- Not as effective for a deep clean
Now that you have the steps for using the dry method, let’s take a closer look at one of the best wet methods for cleaning.
Wet Methods For Cleaning
You might be wondering, “If the dry method is the absolute minimum precaution I can take for keeping my records in great condition, do I need to take it a step further and use the wet method?”. The cleaner your records are, the easier they will spin, and the better they will sound. Ultimately it’s completely up to you if you decide to take your cleaning a step further.
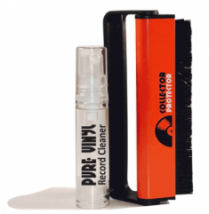
You can either follow the steps below for this type of clean or you can buy a kit that comes with a pre-mixed solution that also works well. Most of these kits also include a brush that can be used for dry or wet cleaning. The Collector Protector vinyl record spray kit here is one of the most highly rated cleaning kits.
Alternatively, you can mix your own solution which will probably end up saving you more money in the long run. Each step is listed below that you can use to follow along with if you decide to do it yourself.
In order to get the most out of your collection (new or old), regular cleaning goes a long way. To use the best DIY wet method for cleaning, you’ll need to grab a few materials (unless you already have them) before you get started. Take a look at the list below.
What You’ll Need:
- Distilled water
- Isopropyl alcohol
- Measuring cup
- Spray bottle
- Finish Jet Dry Rinse Aid
- Paint edger
- Microfiber towel or cloth
- Microfiber applicator pad
- 100 % cotton cloth
Once you have everything you need to get started, follow along with the steps below. *When mixing the liquid, the measurements don’t have to be exact, but if you do your best to keep it within reason, you’ll be fine.
*Another important thing to note: The isopropyl alcohol will not damage your record but make sure you use isopropyl alcohol and isopropyl alcohol alone.
Here are the steps from beginning to end. Once you’ve gone through each one, repeat the steps for the other side of your record.
Step-by-Step Part 1:
- Approx. 1 cup of distilled water
- 1/8 – 1/4 cup of isopropyl alcohol
- A few squirts of Jet Dry Rinse Aid
- Add the mixture to your spray bottle and lightly shake it
Step-by-Step Part 2:
- Find a flat, stable surface
- Place a clean towel or wax paper over the surface
- Put your record down
- Spray all the way around the surface of your vinyl (doing your best to avoid the center label)
- Let it sit for about 20-30 seconds
- Take the paint edger, put it on top of the record, and using slight pressure go around the entire surface along the grooves
- Let it sit for about 30 seconds – 1 minute
Step-by-Step Part 3:
- Take the microfiber applicator pad and lightly follow the grooves in a circular motion
- Turn the applicator pad over and repeat the process in the opposite direction
- Take the 100% cotton cloth and lightly run it over the surface to dry up any remaining wetness
- Let it dry for about 20 seconds
- Use the microfiber towel/cloth and use the same motion you would if you were waxing your car over the entire surface
Pros:
- Inexpensive, but extremely effective
- Works well on older and newer records
Cons:
- Somewhat time-consuming
- Extra materials needed
If you want to see a method you may not have heard of before, keep reading below to see how to use the wood glue method for cleaning.
Using Wood Glue For Cleaning
The Wood Glue method is a bit more complex than the other methods we covered above. It involves a detailed process, a few materials, and time. This method takes the longest by far but some collectors swear by the results.
If you’re worried about ruining your record by applying globs of wood glue all over the place, don’t. You don’t need to worry about that for two reasons. One, since vinyl is made of a material similar to the actual glue you’ll be using – it won’t stick or leave a film once cleaned. Two, if done correctly, you won’t be randomly dumping an entire bottle of wood glue onto your record.
Think of this method as using a lint-roller, but for vinyl instead of clothing. All the excess dust, debris, and other miscellaneous oils (from your hands) will stick to the wood glue and remove it completely.
If you’re still a little skeptical, it might be a good idea to practice this method on an older record first. Then, if you’re satisfied with the results, use it to clean your more expensive/sentimentally important albums.
You can see the full process from A to B in the video below:
What You’ll Need:
- Bottle of wood glue
- An index card, unused credit card, or another flat object for spreading the glue
- A level surface (with wax paper)
- Toothpick (or your fingernail)
- Time
Although you can use your turntable as a level surface for spreading and rotating – it’s generally not advisable since you’ll probably end up spilling glue on it. A card table, kitchen table, or any other flat surface that can’t be tipped over easily would be your best option.
Pros:
- Arguably the most effective cleaning method
- Extra materials needed
Cons:
- Takes more time (about 24-36 hours from start to finish in some cases)
The wood glue method will really get the job done, leaving your records squeaky clean and glistening.
Which Method Is The Best?
As far as which method is the best, that depends on a few things. How clean do you want your records to be? For the best deep clean, we recommend using the wood glue method.
The best quick clean that should be done before and after each play is the dry method. It doesn’t take too much time to grab an anti-static brush and sweep all the extra debris off both sides and will pay off in the end.
For the best clean that’s not as time-consuming but will require some extra attention, try using the wet method. It’s a proven cleaning method that will make your records shine and even sound cleaner.
All three methods included here will work wonders on your vinyl collection. It’s a good idea to get into the habit of cleaning them on a regular basis. Most collectors also recommend that you should clean new vinyl straight out of the sleeve before you give it a spin.
Once you get into the habit of avoiding skin contact with any part of the record that has grooves and start giving them a quick brush before each play, you’re well on your way to taking preventative measures that will keep your records in pristine condition.
Now That You Know How To Clean Your Records…
Some of you might already have a decent collection but some of you might be curious and want to learn everything you need to know before you jump in and start. Maybe you stumbled across this page because you’re interested in entering the hobby of vinyl collecting but haven’t started yet. If that sounds like you, click here to see our review of one of the best entry-level turntables.
You might also enjoy browsing some of our favorite records here. I hope you found this How To Clean Vinyl Records By Hand guide helpful. If you have any more questions about the methods described here, feel free to leave your question below.
What is your favorite cleaning method? If you’re new to collecting vinyl, which method are you most excited to try? Thanks for stopping by and checking out our guide!
Sonic Elevation: Ride The Waves.
- Korg B2 vs Roland FP10 | Which One To Buy - May 13, 2021
- How Does Music Affect The Brain? – Let’s Find Out! - April 6, 2021
- Why Are My Headphones Crackling? – How To Fix It - April 3, 2021
Thanks Dom! This was very informational. I have records because I love the authentic sound they bring. I will probably try a number of these useful vinyl cleaning techniques.
I like the wood glue one the best because it can return the vinyl record to a quality sound like new. Everyone should have a vinyl record cleaning brush to ensure the record does not get caked with dust.
Thanks,
-David L.
You’re very welcome David, I’m glad to hear that you were able to find some new ways to clean your vinyl records by hand. 🙂
I collect vinyl for the same reason, it’s hard to beat the feeling you get when you can hear every instrument, sound effect, and vocal tone inflection – pure, unadulterated recordings.
Great choice, a lot of collectors prefer the wood glue method for the exact reason you stated. As long as you have the time and patience, it should leave your records squeaky clean.
*Just as a side note, it might be a fun experiment to buy some old, beat up records at a thrift shop, clean them using wood glue, and see how they sound.
I agree, it would be nice if you got a basic complimentary cleaning brush with vinyl purchases (maybe with a limited edition bundle or something along those lines) because it really is a necessary tool of the trade (or hobby).
Thanks for stopping by David, I hope you have fun trying the wood glue method and are happy with the results!
Oh my! This did take me back a few years! I remember sitting in front of the record player and playing one record after the other. My dad was into the 50’s and 60’s pop music. The crackling sound is a familiar memory! We always thought it was the needle. Who would have thought that wood glue would clean it up!!! I wonder who even thought of it.
I’m glad you were able to take a trip down memory lane – it sounds like it was a positive memorable experience for you. 🙂
There’s really no way to completely eliminate the slight crackle but when it’s louder than usual it could be an issue with with too much dust collected on the actual needle (which also contributes to excessive surface noise).
It is pretty amazing that there are so many great ways to keep your records clean without having to buy an expensive machine. That’s definitely an interesting thought – until the wood glue method was used successfully the first time, it would seem like a risky move for sure!
Going back to your experience listening to one record after the other, I think a lot of people can relate to that (even if they’re new to collecting and listening to music on a turntable). Part of the reason vinyl’s still around after all these years is because it creates a tangible experience that’s very distinct from simply pressing play on a touch screen.
Thanks for stopping by and sharing your experience, I’m glad you enjoyed!