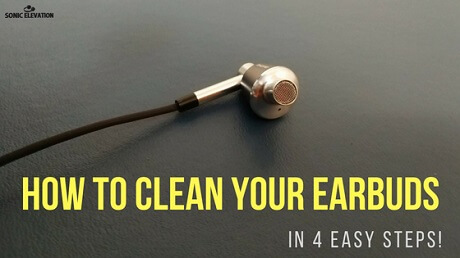
How To Clean Your Earbuds In 4 Easy Steps!
If you wear in-ear headphones every day, you know how dirty they can get! No matter how much you try to prevent it, earwax almost always finds a way inside. Our goal is to help you learn how to clean your earbuds – which will not only help preserve their quality, but also improve their overall performance.
We’ll also give you a few tips and recommendations (at the end) that you can use in the future to help minimize excessive wax buildup! We think you’ll find this guide extremely helpful (especially if you’re someone who likes to use your ‘buds at the gym, or fall asleep with them in your ears)!
If regular cleaning seems like a chore right now, you might change your mind after you read the 4 easy steps below! It’s a fairly simple process that only requires a few supplies to get started!
How To Clean Your Earbuds
Most of the cleaning supplies you’ll need to get the best results are everyday items that you might already have in your kitchen or bathroom. Take a look at the list below to see what you’ll need to get started:
- Dry toothbrush (or other small brush)
- Soap & water
- Cotton swabs
- Paper towels or microfiber towel
- Rubbing alcohol
- Time!
Once you’ve gathered all the supplies, you can follow along with each step as you go. Each section will give you an in-depth explanation for each step. Here are the 4 easy steps that we’ll be covering in this guide:
- Remove Both Ear Tips
- Wash Both Ear Tips
- Scrub The Wax Off Both Grills
- Use A Cotton Swab & Rubbing Alcohol
*Before you start following along with each step, make sure you disconnect and unplug your earphones from your phone, laptop, or any other external device. (As you know, water and electronics don’t get along very well.) If you’re ready to get started, start by removing both ear tips!
1. Remove Both Ear Tips
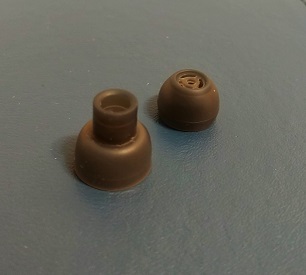
After you’ve disconnected your headphones, the first thing you want to do is remove both ear tips. Once you’ve taken them off, you’ll be able to see what kind of mess you’re dealing with. The picture below is a prime example of what they’ll look like if you’ve never given them a proper cleaning.

Earwax buildup not only looks pretty disgusting, but can also block the tiny holes in the grill. When the holes are blocked, the quality and volume of your music can start to go downhill. Now that you’ve removed both tips, you’ll want to wash them using soap and water!
2. Wash Both Ear Tips
To start off, keep in mind that you don’t need a special soap to perform this step. Regular dish soap works perfectly fine. Grab a bowl or other cup (that you’ll wash out later) and add some water plus some soap. There isn’t any exact measurement you have to follow – as long as the water is nice and soapy!
Next, dunk the tips in the soapy water. Then, take the cleaning cloth or a paper towel and wipe the suds away. If you’d rather let the water do most of the work, you can let them soak while you perform the next steps. Whether you let them soak or wipe them off right away, the result is the same.
It’s also important to make sure that you only use soap and water (not alcohol) for this specific step. If you’re wondering why it’s not recommended to use rubbing alcohol for this step – it’s because the alcohol will eat away the outer material and ultimately change the color of your tips.
After a few minutes, remove the tips from the bowl (or cup) and let them dry while you finish the last few steps. We usually turn them inside out and let them sit on a paper towel or dry cloth then come back later to make sure they’re completely dry.
While you’re letting the tips dry, you can start removing the wax from both grills!
3. Scrub The Wax Off Both Grills
For this step, you can use any dry brush with stiff bristles. Most people choose to use a regular (or child’s size) toothbrush. Any small soft brush will get the job done, as long as you’re not using a wire brush meant for cleaning grills (since that would wreak irreversible havoc).
Once you’ve decided on which brush to use, start lightly scrubbing the grill on the end of each nozzle. This is where most of the earwax starts to build up and block the grill openings. Try your best to brush gently. Scrubbing too hard can push the wax all the way through the holes or dent the actual grill.
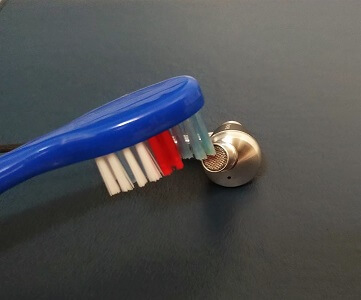
There’s no need to apply the same amount of pressure you do when you brush your teeth. You’ll know you’re doing it right when you start to see the wax disappear. After you’ve gotten rid of the wax on the grill, you can use the brush to get rid of any other wax you see around the earpiece. Once you’ve scrubbed all the visible wax off, you’re ready to move on to the final step!
4. Use A Cotton Swab & Rubbing Alcohol
For the final step, grab a few cotton swabs and some rubbing alcohol. Then, very lightly dampen the cotton swab with the rubbing alcohol. By ‘very lightly’ we mean just enough that the cotton is moist, but not so much that the alcohol is dripping off the cotton swab.
If you’re worried that you got too much rubbing alcohol on the swab, you can take a paper towel and use it to soak up any excess liquid. A good rule of thumb is to use less than you think you need. (It’s usually best to err on the side of caution, instead of crossing your fingers and hoping for the best.)
Next, take the damp cotton swab and make your way around the outside of both earpieces. If this is your first time cleaning your ‘buds this way, you might be pretty surprised how much wax collects on the outside of the nozzle. As you’re making your way around, try your best to avoid any other holes on the earpiece housing.
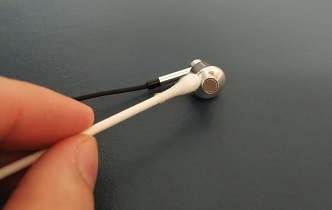
After you’ve scrubbed the outside of both earpieces, move on to the grills. Using the same amount of pressure from the 3rd step, very lightly scrub the surface of both grills. We recommend you hold both earpieces with the nozzles pointing down while you’re scrubbing. That way, if you did happen to put a little bit too much alcohol on the swab, it won’t drip down through the opening.
As you’re scrubbing, you should start to see the earwax basically melt away. Once you’re satisfied with your work, throw the cotton swabs away and grab a dry cloth or paper towel. Next, set them face (nozzle) down on the towel for a few minutes.
Once again, try to keep the nozzles pointing downwards as they dry. Now, let them air dry in this position for a few minutes. After a few minutes (usually 5 or less), come back and make sure they’re completely dry. If they’re still slightly damp from the alcohol swab, you can use the paper towel to wipe them off one more time.
After the earpieces and tips are clean and dry, you can put both ear tips back over the nozzle and admire your work. (The end results are usually night and day.) Here’s a picture of the end result from the dirty ‘buds pictured above:
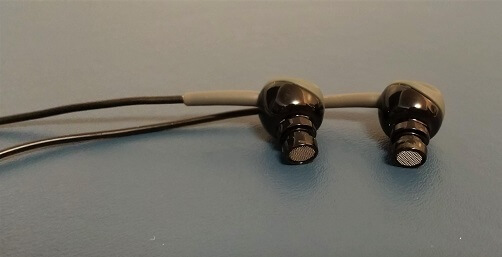
Going through the entire process is pretty satisfying when you get results like that! The entire process usually takes about 20-30 minutes from start to finish. (If you don’t have the time to follow along at home right now, feel free to save this page for later.)
Now that you’re done making them look brand new again, take a look at the basic tips below for preventing excessive buildup in the future!
Basic Tips For Preventing Excessive Buildup
Some people recommend that you perform a regular cleaning using the steps above at least once a week. Our opinion is that you’ll know when they need another deep clean. (Once you start seeing earwax through the ear tips, it’s probably time to repeat the process.) There are a few exceptions where you may want to wipe them down more than once a week.
For example, if you wear your ‘phones at the gym more than once a week, it’s usually a good idea to quickly wipe them down when you’re done. It’s probably not necessary that you go through the entire process, but removing both ear tips and wiping them down with a clean cloth will help them perform at their best.
Another way to prevent excessive build up from gathering inside each earpiece is to store them in their carrying case (as much as possible). Storing your in-ear headphones in their case (or carrying pouch) will help keep most dust and other debris away from the openings of either earpiece.
Direct Sunlight & Proper Storage
We also recommend that you avoid storing them anywhere they’ll be exposed to direct sunlight (like the dashboard of your car). Extreme temperatures can cause unnecessary damage over time that will become much more noticeable as time goes by.
Try to picture a pair of (non-intentionally) faded pants or an old hat that’s been worn down after years of continuous use. (That can also happen to your personal audio gear.) We understand that it is a somewhat extreme example, but regularly taking excellent care of them will help preserve their original quality.
That Wasn’t So Bad, Was It?
If you want to make sure your ‘buds not only sound better, but also look brand new – we highly recommend that you use these 4 basic steps! Now that you’ve made it to the end, what do you think? Do you know how to clean your earbuds without damaging any of the electrical components?
Was it easy to follow along with, or could we do a better job at explaining the process? We’d love to hear some feedback from you, so feel free to leave your thoughts below! If you have any questions about the cleaning supplies or anything else we covered here, drop a question in the comment section!
We hope you enjoyed this short guide and were able to get rid of that annoying wax buildup! Now that your headphones are nice and shiny, you might enjoy browsing a few of the Best Headphone Albums here. Thanks for stopping by, we look forward to hearing from you!
Sonic Elevation: Ride The Waves.
- Korg B2 vs Roland FP10 | Which One To Buy - May 13, 2021
- How Does Music Affect The Brain? – Let’s Find Out! - April 6, 2021
- Why Are My Headphones Crackling? – How To Fix It - April 3, 2021
